“Courier Integrations” is an addon feature in Breww with an additional monthly cost, based on how many consignments you generate. For costs, please see Breww pricing.
Setting up a courier integration
The below steps will guide you through how to enable a courier integration, and then further down the article explains how to print labels and track the status of deliveries.
Enable couriers you use
Firstly, you’ll need to make sure you have told Breww which couriers you use. This can be done by going to Settings → Delivery settings → Couriers you use.

If you need a courier not listed, use the “Add courier” button to create them in Breww.
If you have been using couriers in Breww before integrating, you may have already configured this section to your needs.
Integrate Breww with your courier
Click the Integrate with couriers button.
From here, you’ll be able to see any existing integrations set up and add new ones from our list of over 80 supported couriers. Find the courier you need (there’s a search box) and click the Connect with xxx button.
You’ll see a window open that looks a bit like the following (this example is of APC):

You can give the integration a name (which defaults to the courier name), which can be useful if you need to integrate the same courier more than once (i.e. you have two accounts with them).
From the Breww account courier to associate with box, you can choose the courier that you created/enabled in the first step. This will ensure that when this courier is chosen in the main courier management area of Breww, this integration will be used for label creation & tracking. This might seem like a strange step, but this again allows for easy management of multiple accounts with the same courier company.
Next, you’ll need to enter the appropriate API connection details. These vary between the different couriers. In some cases, you’ll know the details already, but some integrations require details such as an “API key”, which you may need to contact your account manager at the courier company for.
Finally, confirm the label size you’d like to use and confirm you are happy to be billed extra for the addon.
Manage the courier services that you use
Having set up a courier integration, you’ll see the courier listed at the top of the page, like this:

You can use the button on the right to select which courier services you use to resolve the warning message.

Often, a courier will offer hundreds of services, with only a few that you use. This allows you to select a short list of the services that you would like to use around the rest of Breww.
Using courier integrations (day-to-day usage)
Assigning orders to couriers/services
Having completed the steps described above, if you head into the delivery section for a day, you’ll be able to assign your deliveries to the right courier, set the service to use, and confirm how many packages (i.e. labels) will be needed to complete the delivery.
Go to Deliveries, choose a date, and go to the Deliveries (courier) tab. It looks a bit like this:

Printing labels in bulk
Above the list of deliveries are the usual bulk printing buttons for delivery notes, invoices, etc. In addition, you will now find a Print courier labels button. This can be used to bulk print all courier labels for the day in one go. As with delivery notes, etc, they will be printed in the same order as the deliveries are listed on-screen.

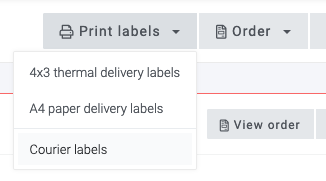
Printing labels individually
If you go to the main delivery page for a delivery, you can use the Print labels button at the top to print both your courier labels, and your Delivery labels (these are the Breww labels you can optionally stick onto the specific stock).
Managing labels
Having printed some labels for an delivery, you will be able to see a breakdown of all the labels near the bottom of the main delivery page. This looks a bit like this:

From here, you can re-print an existing label (ideal if you accidentally damage it), track the delivery status or cancel the label. Cancelled labels will be marked as such in Breww and you will be able to always see what was created originally, even if it has since been cancelled.
Tracking
In addition to the tracking button mentioned above, you can track the delivery status of an order from the main order page:

Clicking on the Track button will open a sidebar with the latest tracking information to save you from ever needing to leave Breww:

We have plans to add new couriers to our supported list in the future, as well as additional functionality to the general management of courier deliveries. If you have any suggestions, please open feature requests.