What’s on the Brewing page?
You can access your batch’s virtual brewsheet using the Brewing button on the batch’s page. Here, you can track the progress through the recipe, add ingredients, take readings and make changes to your recipe.
How do I use the brewsheet to manage ingredient additions?
The virtual brewsheet will follow your recipe’s steps and stages when it opens. (The more built out your recipe is, the more you can get out of the brewsheet).
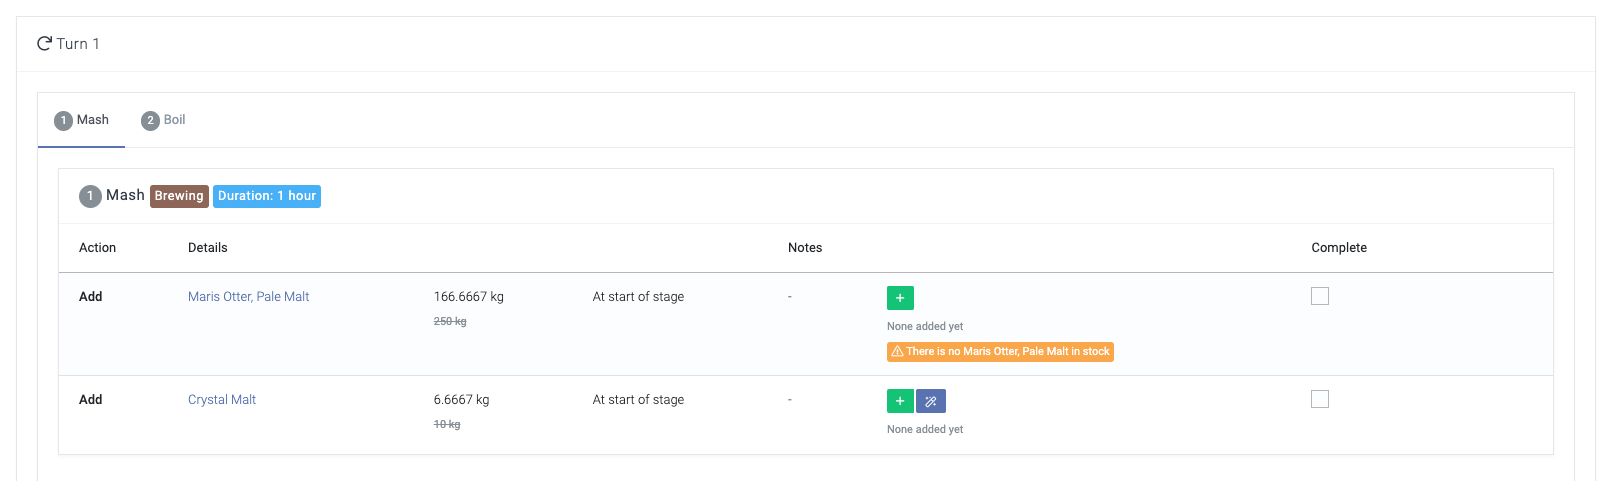
All ingredients the recipe calls will show with a ‘Add’ action row, like in the screenshot above. If you have chosen not to auto-assign stock when setting up the batch, you will now see an option to add the ingredient manually or ask Breww to auto-assign that ingredient. If you add an ingredient using the blue or green buttons (or auto-assign when starting the batch), this will be taken from your inventory and impact your stock level. You can mark each action as ‘complete’ once you’re happy. This may be after adding exactly what the recipe calls for, more, less, or even nothing at all. It’s simply to confirm that you’ve moved on from this action. Ticking the ‘complete’ box itself has no direct impact on stock levels.
If you do not make an addition and mark that action as complete, a notice will pop up to tell you this has been “Marked as complete without using any stock”, you can ignore this if this was the intention.
The main point of ticking the ‘complete’ box is to help you keep track of where you’ve got to in your recipe steps. For example, you might add part of an ingredient, with the aim of adding the rest later. Keeping up to date in what you’ve completed will help you to manage situations like this. The next recipe step for each batch is also shown on the production dashboard, and is based upon what you’ve ticked off.

What if I need to make changes to the ingredient quantity or batch?
Whether you have auto-assigned ingredients or manually added them, you can, within your brewing page, make changes to the batches used and the quantity used. (If you need to, for any reason, change the ingredient used completely, this is covered in the next section.) When you have your brewsheet open, on any add action, there is the ability to add an ingredient batch using the ![]() button, or to edit the ingredient batch already assigned using the
button, or to edit the ingredient batch already assigned using the ![]() button.
button.
The add batch button will simply allow you to add more of the ingredient or stock item from any batch. If you choose the same batch as has already been added, it will simply be merged with the current addition, but if you add more from a second batch, a second batch line will appear, as well as a total quantity below.
The edit button will allow you to edit the quantity of that ingredient or stock items added from that batch. (To remove a batch addition completely, you can simply set the quantity to 0.) If you want to add the same ingredient addition but a different batch, setting the quantity to 0 first will allow you to re-add the addition with the correct batch. However, you cannot substitute or change the ingredient itself here as the brew sheet will always represent the recipe, but you can leave ingredients unassigned in the brew sheet and add a different ingredient in the batch ingredients tab.

Substituting ingredients (adding new ingredients)
If, for any reason, you need to substitute an ingredient on a batch completely, this is not done in the brew sheet. Instead, this is managed in the Ingredients tab of your batch. (As the brew sheet represents the recipe, the original ingredient from the recipe will always show on the brew sheet, and the new ingredient will never appear there.)
In this case, you may wish to mark the original ingredient addition as complete in the brew sheet without any batch or quantity assigned, showing that this step has been completed but leaving it “Marked as complete without using any stock”.

To add a new ingredient, you can simply use the ![]() button in the ingredients tab, choose your ingredient and batch, stage added, quantity and recipe stage it was added in.
button in the ingredients tab, choose your ingredient and batch, stage added, quantity and recipe stage it was added in.

You may also remove already assigned ingredients through the ingredients tab by editing an ingredient using the ![]() and clearing the data in all filled fields and saving your edit. This is particularly useful if you have to remove stock items or ingredients you have assigned if they spilt on the floor, for example, after being assigned.
and clearing the data in all filled fields and saving your edit. This is particularly useful if you have to remove stock items or ingredients you have assigned if they spilt on the floor, for example, after being assigned.
Conclusions:
- You may add a different quantity than the recipe calls for, or nothing at all, and still mark the action as complete;
- Marking a stage as complete, by ticking the ‘complete’ box is for your own reference only and is used to mark how far through the brewing process you are. This does not perform any adjustment to stock in itself;
- The batch’s main status (e.g. Planned, In-progress, Complete) is not affected by ticking all of your recipe stages. A batch is considered completed when all of the beer has been racked or emptied from vessels.